Google5.0 · Forti NovaPriviFilm™ — operated by Forti Nova Ltd
Manufacturer technical data · written warranty terms · UK support
PriviFilm Answers & Guides • Dry application

How to install self-adhesive smart film

A practical UK guide to fitting made-to-measure self-adhesive PDLC film: preparation, dry application, dust and bubble recovery, edge protection, electrical handover and the point where professional installation is the safer route.

Dry installation — never floated with water
Made-to-measure, checked before manufacture
Competent electrician for the final mains connection
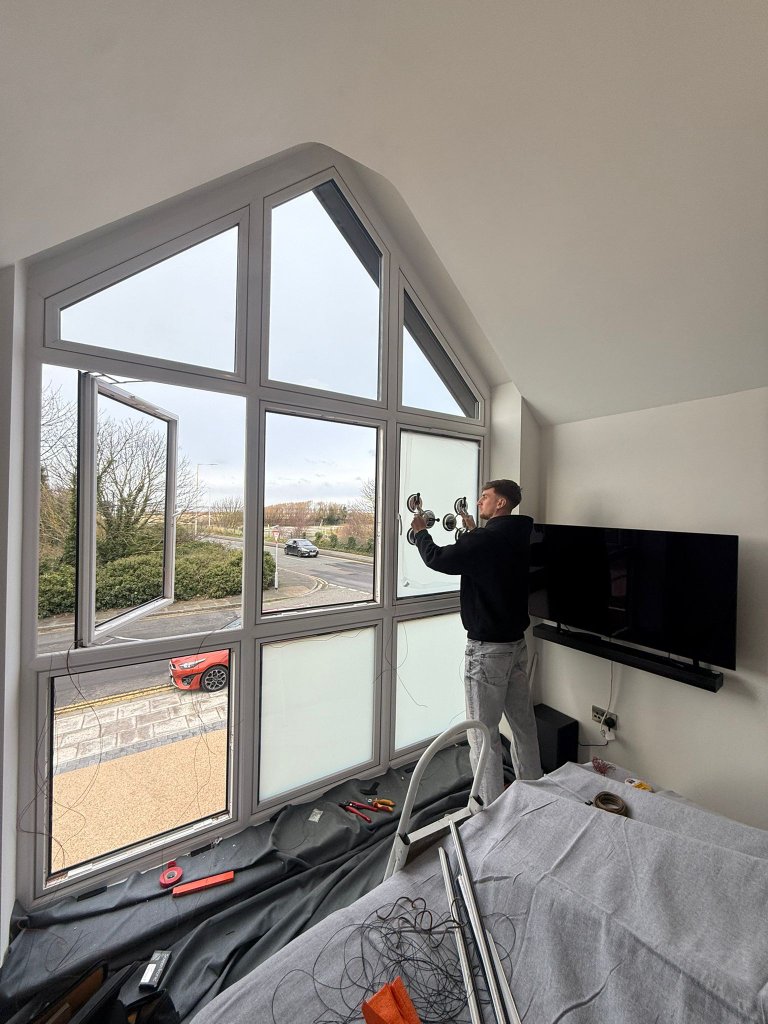
PriviFilm smart privacy film being installed onto interior glass

Forti Nova technical desk

Real installation detail • Forti Nova technical support

The direct answer

Self-adhesive PDLC film is a controlled dry installation.

The glass must be smooth, residue-free and completely dry. Keep the film flat, expose only a short section of adhesive at a time, and laminate from the centre outwards while a second person controls larger panes. Stop immediately for dust or bubbles—do not puncture or hide them.

Critical distinction

Do not use water or wet window-film solution.

This guide is for self-adhesive PriviFilm PDLC film. Water behind the film can contaminate the pressure-sensitive adhesive and electrical edges. Project-specific written instructions always take priority.

Choose the right route

Supply-only confidence without pretending every project is DIY

The same product needs different delivery support depending on pane size, access, environment and who is taking responsibility for the electrical work.

Supply-only can suit you when

  • The glass is smooth, flat, accessible and in sound condition.
  • You can create a genuinely clean, still and dust-controlled work area.
  • The pane can be kept flat and safely supported throughout application.
  • You can follow the approved pane schedule without trimming the film.
  • A competent electrician will complete the final mains connection.
Configure supply-only panes

Use the installation route when

  • Panes are large, high, awkward or difficult to support safely.
  • Glazing beads, existing films or glass suitability are uncertain.
  • The environment cannot be kept clean enough for controlled lamination.
  • Cable routes, controls, BMS integration or moisture exposure need design.
  • You want one accountable route from survey to commissioning.
Request installation assessment
Before opening the film

Tools and preparation checklist

Prepare everything first. Once adhesive is exposed, searching for a tool or clearing dust is already too late.

1

PriviFilm pane schedule and labelled made-to-measure film

2

Clean lint-free microfibre cloths

3

PriviFilm-approved glass cleaner or high-purity IPA where instructed

4

Glass-safe scraper for contamination on suitable glass

5

Clean felt-edge squeegee

6

Low-tack clean adhesive tape for lifting dust particles

7

Clean nitrile gloves and a dust-free working area

8

A second competent handler for large or awkward panes

Project-specific instructions win. The approved pane schedule, transformer label, order documents and written advice from the PriviFilm technical team override generic online guidance.

10-stage dry application

How to fit self-adhesive PriviFilm step by step

Work slowly. Do not move to the next stage until the checkpoint at the end of the current stage is true.

01

Check the pane schedule before opening anything

Match every labelled film pane to the approved manufacturing schedule. Confirm the width, height and power-lead corner while facing the glass from inside the room. PriviFilm supply-only film is made to the approved size, so do not trim, notch or re-cut it unless the technical team has agreed that in writing.

Checkpoint: The film label, glass pane and selected lead position all agree.

02

Inspect the glass, frame and glazing beads

Confirm the application face is smooth, flat and accessible. Remove any existing window film, adhesive or silicone that would sit beneath the new film. Check whether removable beads affect the covered glass area and make sure the prepared film will sit without being forced against frames, gaskets or hardware.

Checkpoint: No texture, damage, coating, obstruction or unexplained size difference remains.

03

Create a clean, controlled work zone

Switch off fans, close doors and stop dusty work nearby. Vacuum the sill, frame and floor before cleaning the glass. Keep enough clear space in front of the pane to hold the film flat. Large panes should be handled by two people: one controls the film and liner while the other laminates it to the glass.

Checkpoint: The area is still, clean and large enough to keep the film flat.

04

Clean the glass and let it become completely dry

Clean the frame first so debris cannot fall onto the finished glass. Clean the glass methodically, including corners and edges, with residue-free materials approved for the product. Where the project instructions specify high-purity isopropyl alcohol, apply it to the cloth rather than flooding the pane. Finish with a fresh lint-free cloth and inspect the glass under strong side light.

Checkpoint: No dust, grease, fibres, cleaner residue or moisture is visible.

05

Dry-position the film with both liners still fitted

Offer the film to the pane without creasing it. Reconfirm orientation, lead position and edge relationship. Never fold, sharply bend or drag the film across the floor. If the pane does not match the schedule, stop and contact PriviFilm rather than forcing it into place.

Checkpoint: The film sits naturally in the intended position with the power lead correctly orientated.

06

Expose only the first 75–100 mm of adhesive

With the film supported flat, peel back a short band of the rear release liner from the top edge. Do not remove the full liner at once and do not touch the exposed adhesive. Align the starting edge carefully, then lightly tack only that first band in position.

Checkpoint: The top edge is square and the remaining film is still supported by its liner.

07

Laminate downwards in short, controlled stages

One person holds the film away from the glass while the other withdraws the release liner roughly 75–100 mm at a time. Use the felt edge of the squeegee in overlapping passes from the centre towards the sides. Let the film meet the glass progressively under control; do not stretch it or chase a large uncontrolled contact line.

Checkpoint: Each completed band is smooth before more liner is removed.

08

Recover dust or bubbles immediately

If a particle or bubble appears, stop. Carefully lift the film only as far as the last clean contact area, keep the adhesive away from surrounding dust, and use clean low-tack tape to pick the particle from the glass or adhesive face. Re-lay the film and squeegee again. Never puncture a bubble with a blade or needle.

Checkpoint: No trapped particle, crease or bubble is left behind before continuing.

09

Finish the edges and protect the electrical connection

Once the film is fully bonded, inspect every edge and the prepared electrical contact area. Remove the front protective liner only when the physical installation is complete. Use only the edge protection or neutral-cure sealant specified for the project; incompatible sealants and cleaning chemicals can damage PDLC film. Keep bus bars and terminations dry, insulated and mechanically protected.

Checkpoint: Edges are clean and protected, and electrical contacts cannot be pulled, wetted or exposed.

10

Have the electrical system connected and commissioned

Use only the matched PriviFilm transformer and the output stated on the supplied project documents. The final 230 V mains connection, testing and any fixed wiring must be completed by a competent electrician, with Part P and certification requirements considered where applicable. Test each pane for uniform clear and private states, confirm the remote or control method, then retain the pane schedule and handover information.

Checkpoint: Every pane switches uniformly and the electrical work has been safely completed and documented.

Avoid expensive mistakes

Six things never to do with self-adhesive PDLC film

These are the errors most likely to create visible defects, damage electrical edges or turn a recoverable installation into a replacement pane.

No wet application

Self-adhesive PDLC film is installed dry. Water or slip solution behind the film can contaminate the adhesive and electrical edges.

No generic household chemicals

Avoid ammonia, bleach, abrasive cleaners and residue-forming glass products unless PriviFilm has confirmed compatibility.

No folding or tight rolling

A crease can permanently mark or delaminate the multilayer film even if the surface later appears flat.

No on-site trimming by assumption

The supply-only system is manufactured to the approved schedule. Stop and ask if any dimension or obstruction does not match.

No improvised power supply

Transformer output must match the supplied system. Never connect smart film directly to UK mains electricity.

No buried inaccessible transformer

The transformer and control equipment need appropriate ventilation, protection and future service access.

Problem recovery

What to do if something goes wrong during fitting

The starting edge is not square

Stop while only the first band is tacked. Lift it carefully, support the pane and realign before exposing more adhesive.

A dust speck appears

Lift back only to the affected point and use clean low-tack tape to pick the particle away. Do not wipe the adhesive with fingers or cloth.

A large bubble forms

Stop withdrawing the liner. Lift to the last smooth contact line, reduce the exposed area and re-laminate with overlapping centre-out passes.

The film seems too large or obstructed

Keep both liners fitted and contact PriviFilm. Do not trim around beads, handles or fittings without written approval.

A pane does not switch uniformly

Switch off and stop. Check the supplied project schedule and have the competent installer verify connections, transformer matching and protected terminations.

Moisture may reach an edge

Do not commission until the detail has been reviewed and the specified compatible edge protection has been applied and cured.

Electrical safety and handover

The film application and the mains connection are separate responsibilities.

PriviFilm supplies the matched system for the approved pane schedule. A competent electrician must complete the final 230 V connection and fixed wiring, confirm the applicable UK inspection and certification route, and commission the controls. Electrical work in dwellings must comply with Part P where applicable.

Installation answers

Self-adhesive smart film FAQs

Direct answers for customers comparing supply-only fitting with PriviFilm’s assessed installation route.

Is self-adhesive smart film installed wet or dry?+

Dry. PriviFilm self-adhesive PDLC film must not be floated into place with water or application solution. The glass is cleaned, allowed to dry completely and the release liner is removed gradually while the film is squeegeed down.

Can I install PriviFilm supply-only smart film myself?+

A careful, technically competent customer or trade professional may be able to complete the physical dry application on suitable flat glass. Large panes normally need two people. The fixed mains electrical connection must be completed by a competent electrician, and project-specific written instructions and warranty terms always take priority.

Does PriviFilm supply the smart film cut to size?+

Yes. The supply-only configurator produces a pane schedule and PriviFilm checks the proposed manufactured dimensions before manufacture. Do not trim or re-cut the finished film unless PriviFilm has approved it in writing.

How do I stop dust and bubbles under smart film?+

Control dust before opening the film, clean the frame before the glass, inspect the dry pane under strong side light and remove the liner in short stages. If a particle appears, stop, lift only to the last clean area and pick it away with clean low-tack tape before re-laying the film.

How many people are needed to install a smart film pane?+

Small, manageable panes may be fitted by one experienced person. Two people are strongly recommended for large, tall or awkward panes so one person supports the film and liner while the other controls the contact line and squeegee.

Can I puncture a stubborn air bubble?+

No. A blade or needle can damage the active PDLC layers. Lift the film carefully back to the bubble, identify contamination or trapped air, correct it and re-laminate the area.

What cleaner should I use before installation?+

Use residue-free materials approved in the PriviFilm project instructions. Where high-purity isopropyl alcohol is specified, use it sparingly on the glass with a clean lint-free cloth and allow the pane to become completely dry. Do not apply solvent to the film or electrical contacts.

Do smart film edges need sealing?+

Edge protection depends on the glass detail and exposure. Use only the neutral-cure sealant or protection method specified for the project. Bathrooms, clinical areas and other moisture-risk locations need particular attention to keeping film edges and electrical terminations dry.

Who connects the smart film transformer to the mains?+

A competent electrician must complete the final 230 V mains connection and fixed wiring. Some domestic electrical work may also be notifiable under Part P. The electrician should confirm the applicable inspection, testing and certification requirements.

What should I do if the pane size or lead position looks wrong?+

Stop before removing the release liner. Photograph the label, glass opening and obstruction, then contact PriviFilm. Do not cut the film, move prepared electrical contacts or force the pane into the opening.

Can PriviFilm arrange professional installation instead?+

Yes. PriviFilm can assess the glass, access, electrical route and programme, then deliver through its in-house installation team or trained approved contractor network, subject to coverage and availability.

Choose the PriviFilm route that matches your confidence and project risk.

Buy the complete made-to-measure kit with technical review, or send us the project and let PriviFilm assess the glass, access, programme and installation route.

Manufacturer-backed ten-year warranty subject to product, installation and written warranty terms.

Continue with the PriviFilm technical library

Check maintenance, technical specification, power use and direct customer answers before confirming the order.

PriviFilm starting prices

Choose supply only or a professionally installed system

Prices exclude VAT and are calculated per square metre. Installation is subject to glazing, access, controls, location and site requirements.